搭建react开发环境

爱吃猪头爱吃肉

最近看到有网友给react维护者提意见,说是把webpack改成vite,不得不说create-react-app 是真的慢😭,cli用多了就总想试试自己搭建一个开发环境。话不多说,开整!!!

img

1. 项目依赖

首先需要了解一下我们用webpack搭建一个什么的react环境

  1. 最基础的打包构建以及开发服务器得有吧
  2. 万一浏览器版本比较低,仅支持到ES6。那JavaScript的polyfill得有吧,那css也得兼容其他浏览器
  3. 说到React想到的UI库,首选肯定是antd啊,那CSS预处理器只能选less了(虽然我也很中意它)
  4. 现在都用TS,那我也得紧跟潮流,用TS不过分吧
  5. 说到React,那肯定得用React三件套的剩下两件啊啊,ReactRouterDOM、Redux
  6. OK,到这一步核心基本准备好了,但还得加点料,ESLint、CommitLint、husky、lint-staged、Prettier

针对以上的诉求,我们选用以下版本

1
2
3
4
5
6
7
8
9
10
11
12
13
14
15
16
17
18
19
20
21
22
23
24
25
26
27
28
29
30
31
32
33
34
35
36
37
38
39
40
41
42
43
44
45
46
47
48
49
50
51
52
53
54
55
56
57
{
"devDependencies": {
"@babel/core": "^7.21.4",
"@babel/preset-env": "^7.21.4",
"@babel/preset-react": "^7.18.6",
"@babel/preset-typescript": "^7.21.4",
"@squoosh/lib": "^0.5.3",
"@types/clean-webpack-plugin": "^0.1.3",
"@types/copy-webpack-plugin": "^10.1.0",
"@types/html-webpack-plugin": "^3.2.6",
"@types/node": "^18.16.1",
"@types/react": "^18.2.0",
"@types/react-dom": "^18.2.1",
"@types/react-redux": "^7.1.25",
"@types/react-router-dom": "^5.3.3",
"@types/speed-measure-webpack-plugin": "^1.3.4",
"@types/webpack": "^5.28.1",
"@types/webpack-bundle-analyzer": "^4.6.0",
"@types/webpack-merge": "^5.0.0",
"babel-loader": "^9.1.2",
"clean-webpack-plugin": "^4.0.0",
"copy-webpack-plugin": "^11.0.0",
"core-js": "^3.30.1",
"cross-env": "^7.0.3",
"css-loader": "^6.7.3",
"css-minimizer-webpack-plugin": "^5.0.0",
"file-loader": "^6.2.0",
"html-webpack-plugin": "^5.5.1",
"image-minimizer-webpack-plugin": "^3.8.2",
"less": "^4.1.3",
"less-loader": "^11.1.0",
"mini-css-extract-plugin": "^2.7.5",
"postcss": "^8.4.23",
"postcss-loader": "^7.2.4",
"postcss-preset-env": "^8.3.2",
"speed-measure-webpack-plugin": "^1.5.0",
"style-loader": "^3.3.2",
"terser-webpack-plugin": "^5.3.7",
"ts-loader": "^9.4.2",
"ts-node": "^10.9.1",
"typescript": "^5.0.4",
"url-loader": "^4.1.1",
"webpack": "^5.80.0",
"webpack-bundle-analyzer": "^4.8.0",
"webpack-cli": "^5.0.2",
"webpack-dev-server": "^4.13.3",
"webpack-merge": "^5.8.0",
"webpackbar": "^5.0.2"
},
"dependencies": {
"react": "^18.2.0",
"react-dom": "^18.2.0",
"react-redux": "^8.0.5",
"react-router-dom": "^6.10.0",
"redux": "^4.2.1"
}
}

2. 项目目录

根据create-react-app 生成目录,我们整个一样的

1682436256039

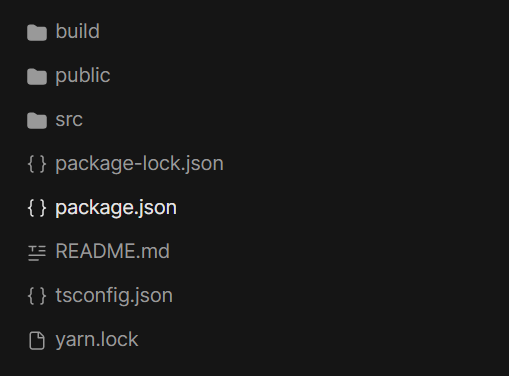
  • build 目录存储webpack配置文件及其其他构建文件
  • src 存放资源目录
  • public 存放静态资源目录,通常是index.html 以及 favicon.ico

3. 搭建环境

3.1 初始化package.json

首先快速初始化package.json npm init -y

1
2
3
4
5
6
7
8
9
{
"name": "react-webpack",
"version": "1.0.0",
"description": "",
"keywords": [],
"author": "",
"license": "ISC",
}

3.2 安装前置依赖

安装支持TS的wepack

我们使用webpack方法提供的方法一进行配置

1
npm install -D typescript ts-node @types/node @types/webpack @types/webpack-dev-server webpack webpack/cli webpack-dev-server

在build文件夹中,新增webpack.config.ts,在src文件夹新增index.ts

1
2
3
4
5
6
7
8
9
10
import { resolve } from "path";
export default {
entry: {
main: resolve(__dirname, "../src/index.ts"),
},
output: {
path: resolve(__dirname, "../dist"),
filename: "index.js",
},
};

安装React

安装react及其类型

1
2
npm install react react-dom redux react-redux react-router-dom
npm install -D @types/react @types/react-dom @types/react-router-dom @types/react-redux

3.3 搭建支持react的webpack环境

安装webpack插件及其loader

webpack plugins能够帮我们在webpack的生命周期中做想做的事情

webpack loader 由于webpack仅支持构建js应用,那么loader能够将非js的资源,转换成js的

1
2
3
4
# 支持html处理
npm install -D html-webpack-plugin @types/html-webpack-plugin
# 移动文件夹
npm install -D copy-webpack-plugin @types/copy-webpack-plugin

根据不同环境配置不同的webpack,利用webpack-merge 将webpack配置进行糅合

配置webpack.common.ts (共用配置)

配置output的filename

1
2
3
4
5
6
7
8
9
10
11
12
13
14
15
16
17
18
19
20
21
22
23
24
25
26
27
28
29
30
31
32
33
34
35
36
37
38
39
40
41
42
43
44
45
46
47
48
49
50
51
52
53
54
55
56
57
58
59
60
61
62
63
64
65
66
67
68
69
70
71
72
73
74
75
76
77
78
79
80
81
82
83
84
85
86
87
88
89
90
91
92
93
94
95
96
97
98
99
100
101
102
103
import { resolvePath } from './utils' // 抽离解析path方法
import CopyWebpackPlugin from 'copy-webpack-plugin' // 在构建后将文件夹移动到产物中
import MiniCssExtractPlugin from 'mini-css-extract-plugin'
import { CleanWebpackPlugin } from 'clean-webpack-plugin'
import WebpackBar from 'webpackbar'

export default {
entry: { //配置入口
main: resolvePath("./src/index.tsx"),
},
resolve: {
alias: {
'src': resolvePath('./src'),
},
extensions: ['.tsx', '.ts', '.jsx', '.js', '.json']
},
// 配置module用于解析模块
module: {
rules: [
// 支持图片
{
test: /\.(png|jpe?g|gif|ico|bmp)$/i,
use: [
{
loader: 'url-loader',
options: {
limit: 8192,
name: 'images/[name].[hash:8].[ext]',
},
},
],
},
// 支持css
{
test: /.(css|less)$/,
use: [
MiniCssExtractPlugin.loader,
'css-loader',
{
loader: 'postcss-loader',
options: {
postcssOptions: {
plugins: [
[
'postcss-preset-env',
{
// 其他选项
},
],
],
},
},
},
'less-loader'
]
},
{
test: /.tsx?$/,
use: {
loader: "babel-loader",
options: {
// 配置babel的预设 也就是预处理 也可以配置在 .babelrc 文件中
presets: [
[
"@babel/preset-env",
{
// 配置polyfill
useBuiltIns: "usage", // 会根据配置的浏览器兼容,按需添加
corejs: 3, // 配置实现polyfill的工具包版本
targets: "> 0.25%, not dead", // 配置浏览器版本
},
],
"@babel/preset-react",
"@babel/preset-typescript",
],
},
},
},
]
},
plugins: [
new MiniCssExtractPlugin({
filename: '[name].[contenthash].css',
chunkFilename: '[name].[contenthash].css',
}),
new CopyWebpackPlugin({
patterns: [ // asset中的图片啥的 都保存到dist中
{
from: resolvePath("./src/asset"),
to: resolvePath("./dist/asset")
},
],
}),
new CleanWebpackPlugin({ cleanOnceBeforeBuildPatterns: ['**/*'], }),
new WebpackBar(),

],
output: {
path: resolvePath("./dist"),
filename: 'bundle.[contenthash].js',
chunkFilename: '[name].[contenthash].js',
},
};

以上配置可以支持基本的资源,但没有对JavaScript做处理,在webpack中我们使用babel对JavaScript进行处理

1
2
# 安装babel
npm install babel-loader @babel/core @babel/preset-env @babel/preset-react @babel/preset-typescript core-js -D
1
2
3
4
5
6
7
8
9
10
11
12
13
14
15
16
17
18
19
20
21
22
23
24
25
26
27
// 在module中新增对js的配置
{
...
{
test: /.tsx?$/,
use: {
loader: 'babel-loader',
options: {
// 配置babel的预设 也就是预处理 也可以配置在 .babelrc 文件中
presets: [
[
"@babel/preset-env",
{ // 配置polyfill
useBuiltIns: 'usage', // 会根据配置的浏览器兼容,按需添加
corejs: 3, // 配置实现polyfill的工具包版本
targets: "> 0.25%, not dead", // 配置浏览器版本
}
],
'@babel/preset-react',
'@babel/preset-typescript'
]
}
},
exclude:/node_modules/
}
...
}

此时我们得到了最基础支持react的webpack配置,针对开发环境与线上环境 还是有所差异的,下一步我们配置开发环境

img

配置 webpack.development

本地开发环境需要啥

  1. 首先就是要配置一个devServer开发机。
  2. 其次当代码出了问题,我希望快速定位到代码位置,所以还需要配置sourcemap,对于sourcemap的选择可以看 webpack常用配置
1
2
3
4
5
6
7
8
9
10
11
12
13
14
15
16
17
18
19
20
21
22
23
24
25
26
27
28
29
30
31
32
33
34
35
36
37
38
39
40
41
42
43
44
45
46
47
48
49
50
51
52
53
import ImageMinimizerPlugin from 'image-minimizer-webpack-plugin'
import HtmlWebpackPlugin from 'html-webpack-plugin' // 在构建文件夹中生成html
import { resolvePath } from './utils'

// 配置服务器相关需要安装 webpack-dev-server

export default {
mode: "development", // 配置当前环境类型
cache: true, // 开启缓存
stats: 'errors-only', // 隐藏控制台信息
devtool: "eval-source-map", // 开发环境使用eval-source-map
devServer:{
compress:true,// 开启gzip压缩
port:8899,// 端口号
open:true,// 默认打开浏览器
headers:{}, // 配置响应头
client: {
overlay:false,// 出现错误全屏覆盖
logging: 'info', // 允许在浏览器中设置日志级别
progress: false, // 在浏览器中以百分比显示编译进度。

}
},
plugins:[
new HtmlWebpackPlugin({
template: resolvePath("./public/index.html"), // 使用的html模板位置
inject: 'body', // script 插入位置
}),
],
// 压缩图片提高展示效果
optimization: {
minimizer: [
new ImageMinimizerPlugin({
minimizer: {
implementation: ImageMinimizerPlugin.squooshMinify,
options: {
encodeOptions: {
mozjpeg: {
quality: 100,
},
webp: {
lossless: 1,
},
avif: {
cqLevel: 0,
},
},
},
},
}),
]
}
}

配置 webpack.production

线上环境当然是能怎么压缩就怎么压缩,保证质量的同时还尽可能的快

我们还需要分析打包文件的大小,便于更好的拆分

1
2
3
4
5
6
7
8
9
# 抽离css样式到单独的文件,防止js打包过大
npm install -D mini-css-extract-plugin
# 压缩css
npm install -D css-minimizer-webpack-plugin
# 压缩js
npm install -D terser-webpack-plugin
# 拆包大小分析
npm install -D webpack-bundle-analyzer @types/webpack-bundle-analyzer

1
2
3
4
5
6
7
8
9
10
11
12
13
14
15
16
17
18
19
20
21
22
23
24
25
26
27
28
29
30
31
32
33
34
35
36
37
38
39
40
41
42
43
44
45
46
47
48
49
50
51
52
53
54
55
56
57
58
59
60
import CssMinimizerPlugin from 'css-minimizer-webpack-plugin'
import HtmlWebpackPlugin from 'html-webpack-plugin'
import TerserWebpackPlugin from 'terser-webpack-plugin'
import { resolvePath } from './utils'
import BundleAnalyzer from 'webpack-bundle-analyzer'

const BundleAnalyzerPlugin = BundleAnalyzer.BundleAnalyzerPlugin;

export default {
mode: "production",
stats: 'normal',
plugins: [
new HtmlWebpackPlugin({
template: resolvePath("./public/index.html"), // 使用的html模板位置
inject: 'body', // script 插入位置
minify: {
collapseWhitespace: true, // 删除空行
removeComments: true
}
}),
// 开启构建展示样式
new BundleAnalyzerPlugin({
analyzerMode: 'server',
analyzerPort: 5000,
openAnalyzer: true
})
],
optimization: {
minimize: true,
minimizer: [
new CssMinimizerPlugin(),
new TerserWebpackPlugin({
parallel: 4, // boolean 是否开启多进程并发 / number 最大并发数
exclude: /node_modules/, // 排除文件夹
terserOptions: {
compress: {
pure_funcs: ["console.log"] // 删除console.log
}
}
})
],
splitChunks: {
cacheGroups: {
vendors: {
name: 'chunk-vendors',
test: /[\\/]node_modules[\\/]/,
priority: -10,
chunks: 'initial'
},
common: {
name: 'chunk-common',
minChunks: 2,
priority: -20,
chunks: 'initial',
reuseExistingChunk: true
}
}
}
}
}

配置webpack.config

1
2
3
4
5
6
7
8
9
10
11
12
13
14
15
16
17
18
import merge from 'webpack-merge'
import commonConfig from './webpack.common';
import devConfig from './webpack.development';
import prodConfig from './webpack.production';
import { Configuration } from 'webpack';

const configMap = {
none: devConfig,
development: devConfig,
production: prodConfig,
} as Record<string, Record<string, any>>


export default (_env: any, args: Configuration) => {
const mode = args.mode ?? 'development';
const config = merge(commonConfig, configMap[mode]);
return config;
}

修改package.json

1
2
3
4
5
6
{
"scripts": {
"start": "webpack server --config ./build/webpack.config.ts --mode=development",
"build": "webpack build --config ./build/webpack.config.ts --mode=production"
}
}

4. 搭建工程化配置

懒得写了,参考工程化配置 这篇文章,自定义个人配置即可

img

5. 配置router与redux

路由配置

  1. 配置router.config.tsx
1
2
3
4
5
6
7
8
9
10
11
12
13
14
15
16
17
18
19
20
21
22
23
24
25
26
27
28
29
30
31
32
33
34
35
36
37
38
39
40
41
42
43
44
45
46
47
48
49
50
51
52
53
54
55
56
57
import React, { CSSProperties, lazy, LazyExoticComponent, Suspense } from 'react';
import { RouteObject } from 'react-router-dom';
import { Spin } from 'antd';

// 定义默认Loading Style
const initStyle = {
minHeight: 'calc(100vh - 156px)',
display: 'flex',
justifyContent: 'center',
alignItems: 'center',
};
// 使用懒加载方式
const lazyLoad = (Comp: LazyExoticComponent<() => JSX.Element>, style: CSSProperties = {}) => (
<Suspense
fallback={
<div style={{ ...style, ...initStyle }}>
<Spin tip="Loading..." />
</div>
}
>
<Comp />
</Suspense>
);

export interface IRouterItem extends RouteObject {
label: string;
icon?: string;
children?: IRouterItem[];
hidden?: boolean;
}

// Layout 内容区router
const containerRouter = () => [
{
index: true,
label: '首页',
icon: 'HomeOutlined',
element: lazyLoad(lazy(() => import('../components/Home'))),
},
];

// 外层router
const baseRouter = (style?: CSSProperties) => [
{
path: '/',
element: lazyLoad(
lazy(() => import('../components/Layout')),
style,
),
children: [...containerRouter()],
},
{ path: '*', element: lazyLoad(lazy(() => import('../components/NotFound'))), hidden: true },
];

const routerConfig = (style?: CSSProperties) => baseRouter(style) as IRouterItem[];

export default routerConfig({ height: '100vh' });
  1. 通过useRoutes 引入config配置,生成路由
1
2
3
4
5
6
7
8
9
10
11
12
13
14
15
16
17
18
19
20
21
import React, { createContext } from 'react';
// 使用ErrorBoundary 捕获异常错误
import ErrorBoundary from 'src/components/ErrorBoundary';
import { useRoutes } from 'react-router-dom';
import routeConfig from 'src/config/router.config';

export const ProjectInfoContext = createContext({
userInfo: USERINFO,
menuList: [] as IMenuItem[],
});

function App() {
const element = useRoutes(routeConfig);
return (
<div className="App">
<ErrorBoundary>{element}</ErrorBoundary>
</div>
);
}

export default App;

状态管理

img

在一个应用中,自然是少不了全局状态管理,一般情况下如果状态比较简单,可以直接使用 React 的 useContext 和 useReducer Hooks 组合实现简单的全局状态管理。

但通常项目过于复杂时并且状态管理较为混乱时,为了提升后期可维护性,使用了 Redux 作为全局状态管理

Redux 的另一大优势则是提供了 @reduxjs/toolkit 辅助工具,使得状态管理更加简单。由于配置较为简单,可以参考Redux 最佳实践 Redux Toolkit 🔥🔥

6. 封装网络请求📶

目前网站大多都使用axios进行二次封装,以满足后端接口返回的数据格式统一化,以及错误信息提示等

img

6.1 封装 Axios

安装 Axios:

yarn add axios

我们在 /src/utils/request.ts 文件中定义如下:

img

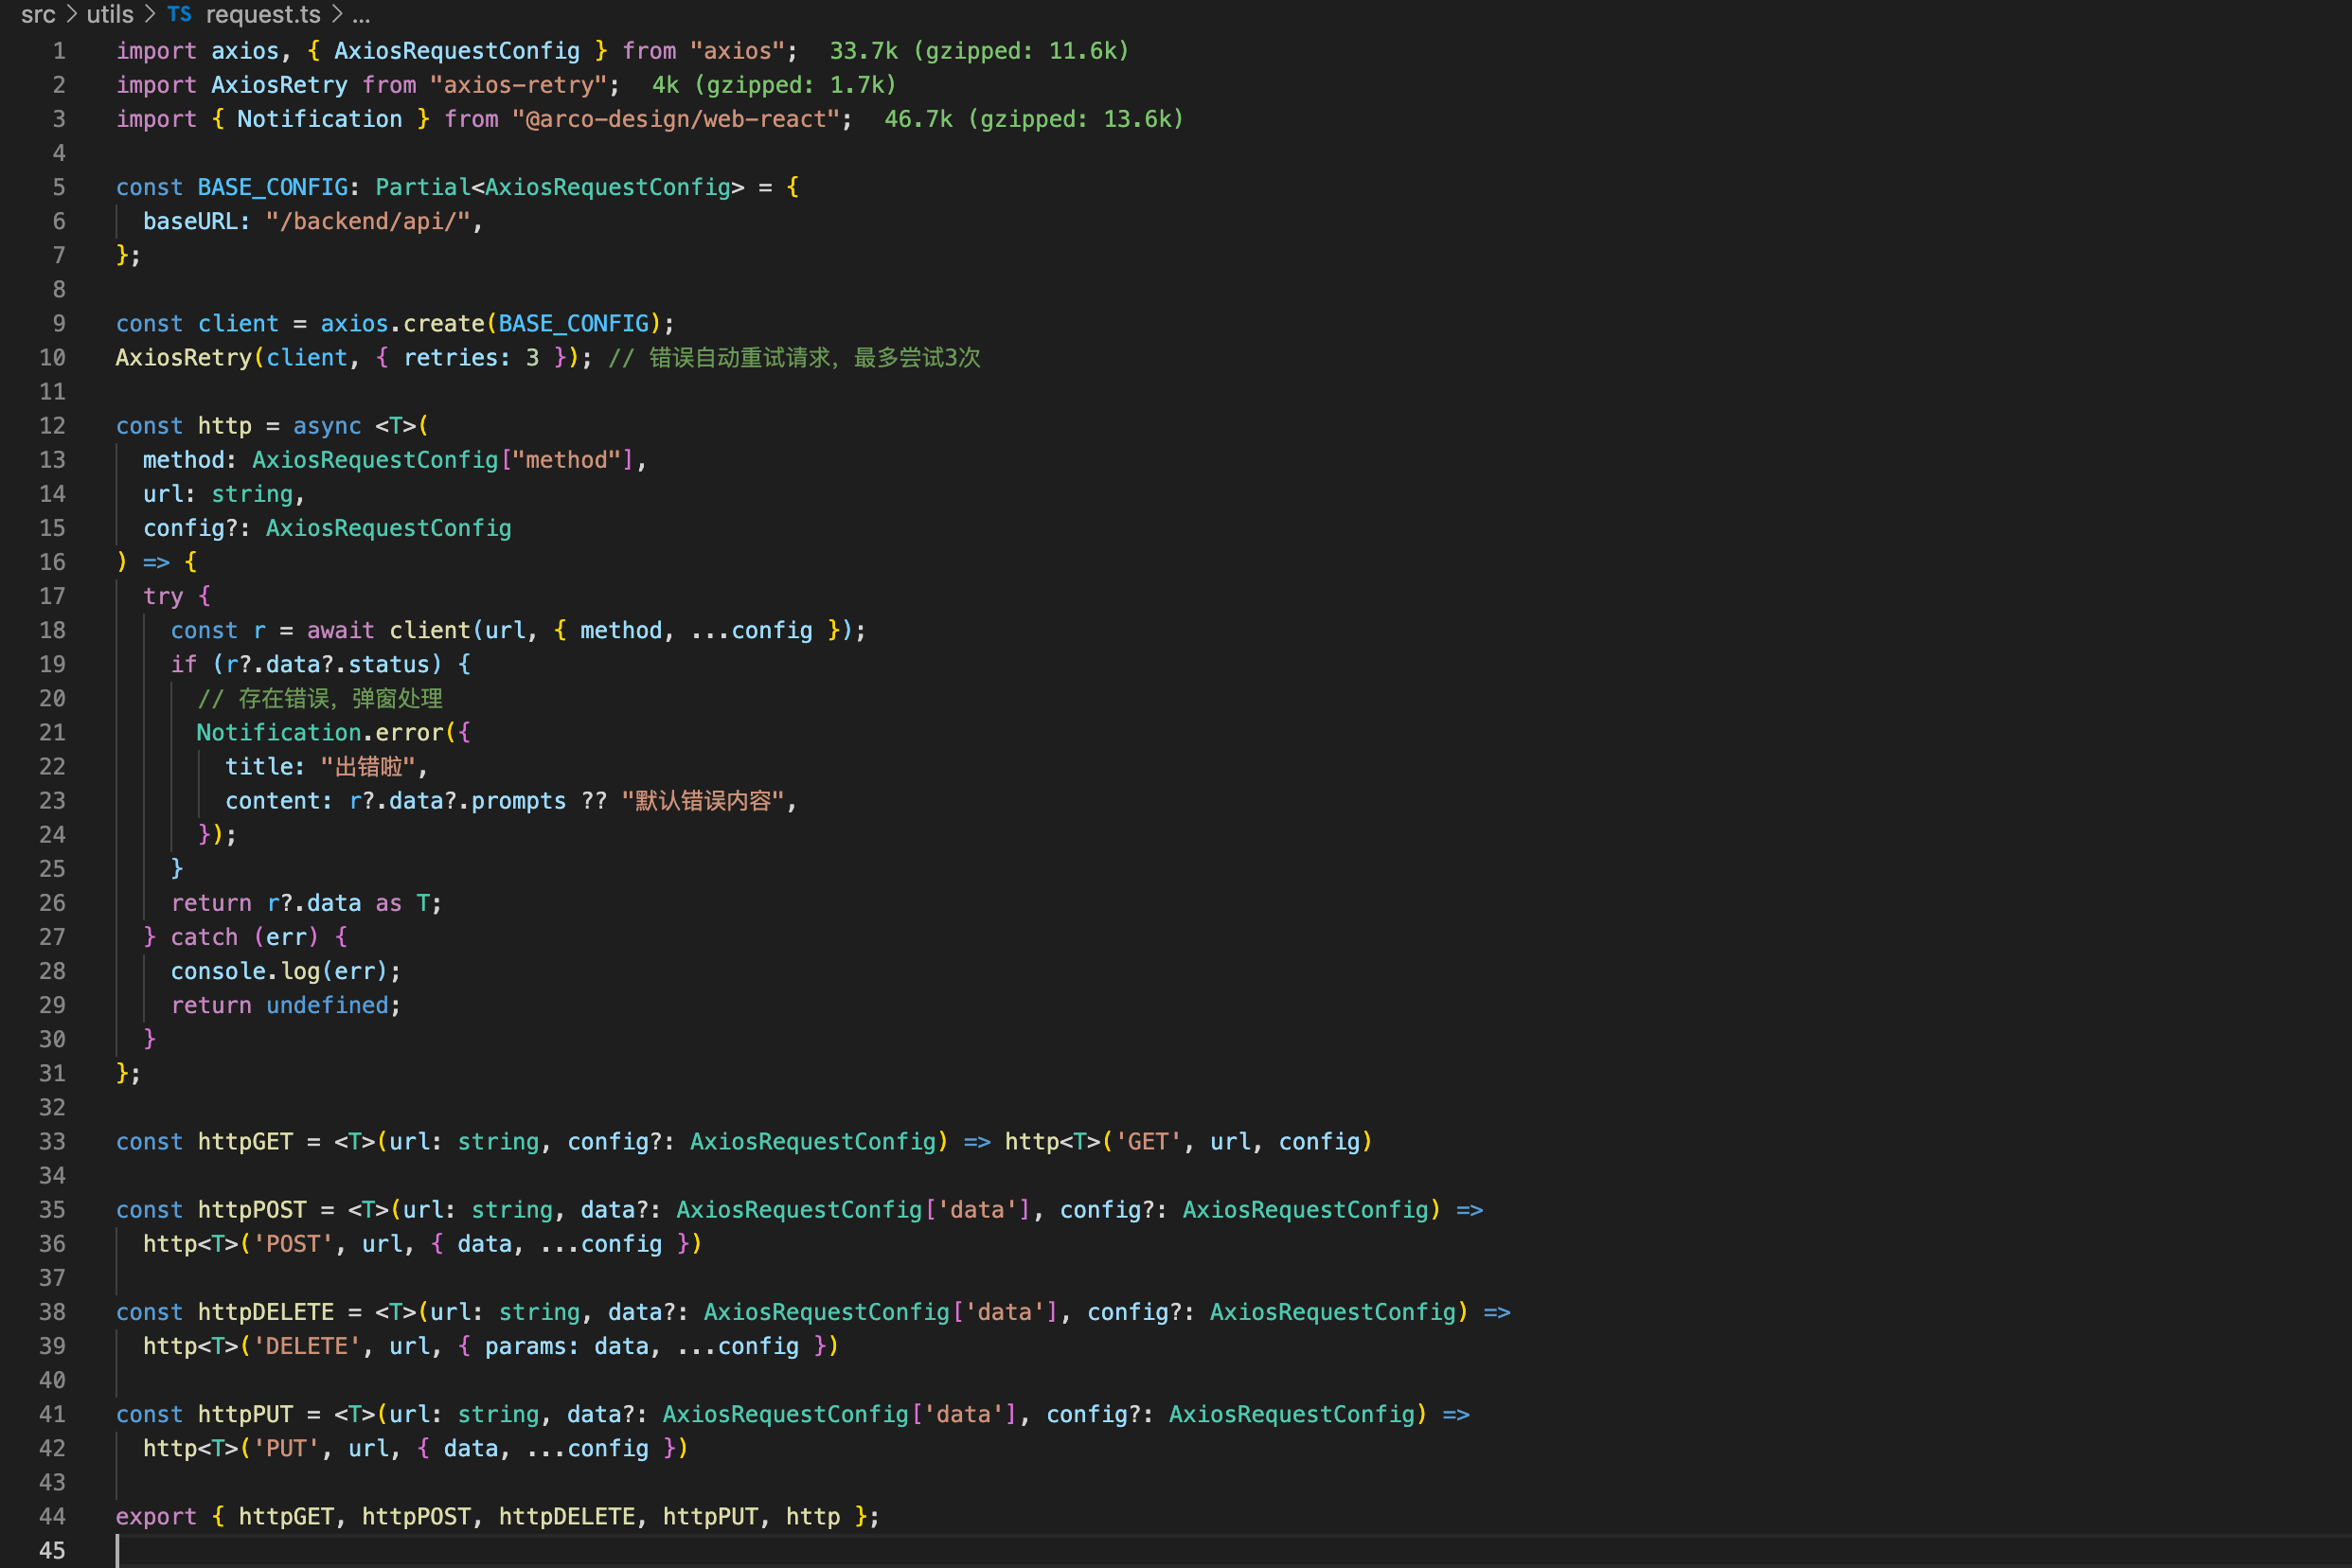
这是一个简单封装的示例,根据业务需求可做一些自定义扩展,或者统一团队的网络请求工具,造个轮子🚗

当需要扩展,可以按照业务需求 & Server 约定在该文件中设置请求和响应拦截器即可!

6.2 请求错误自动重试扩展示例

Axios 的生态也非常丰富,例如可以加入 axios-retry 模块,扩展 Axios 请求错误自动尝试。

# 安装 yarn add axios-retry

然后只需要修改 /src/utils/request.ts

img

6.3 使用

为了统一管理所有的请求调用,因此将相关自定义请求函数放到 /src/api/ 目录下,根据业务需要取文件名,例如用户个人信息相关的,就可以放到 src/api/user.ts 文件下。

img

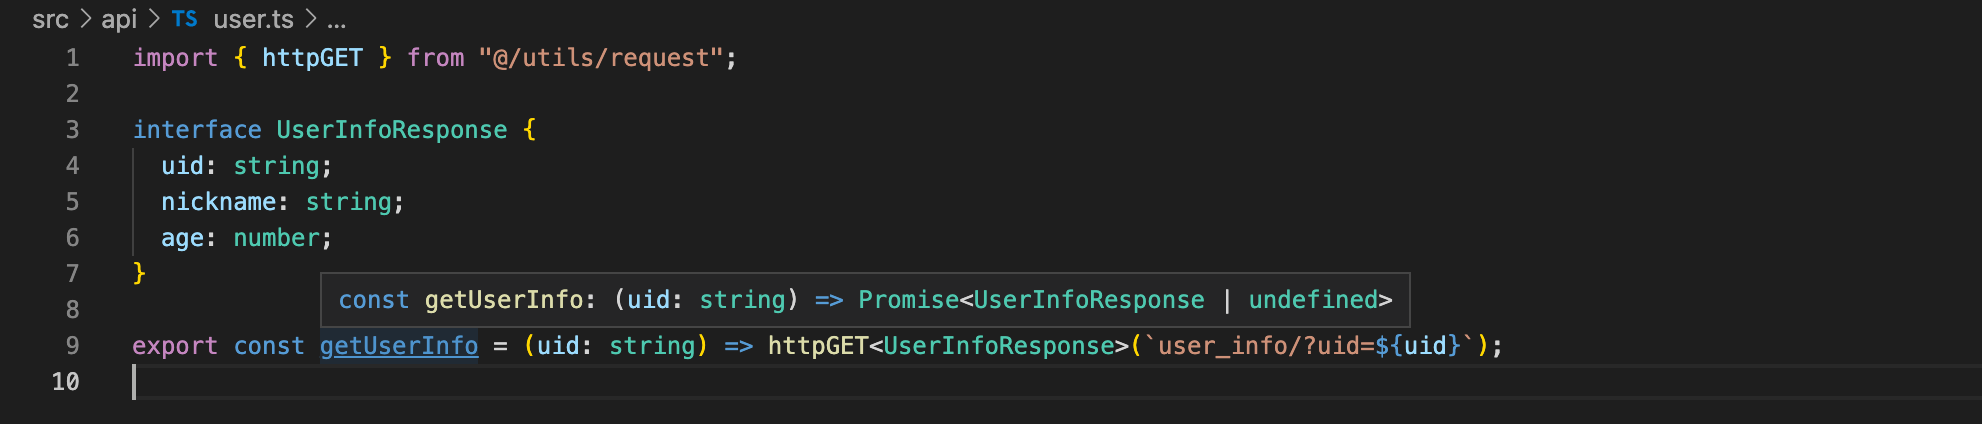
在组件中可以直接调用不同的 api 函数即可,集中管理的方式会更加便于后期维护和升级。

总结

本文简单讲解了如何通过webpack搭建一个支持开发与构建的React TS环境,webpack5后个人感觉配置更加清晰,可根据自身需求去优化webpack构建配置。由于文章过长也没有拆出分别讲述,因此省略了学过细节的配置,比如Commit规范,代码检查,埋点,接入sentry实现错误上报,CI/CD等能够提交项目质量以及开发效率的配置等等。以上文章有啥问题,欢迎留言指正🤝

img

  • 标题: 搭建react开发环境
  • 作者: 爱吃猪头爱吃肉
  • 创建于: 2023-05-03 19:33:15
  • 更新于: 2023-05-05 23:09:36
  • 链接: https://zsasjy.github.io/2023/05/03/搭建react开发环境/
  • 版权声明: 本文章采用 CC BY-NC-SA 4.0 进行许可。
推荐文章
webpack常用配置汇总 webpack常用配置汇总 前端工程化校验配置 前端工程化校验配置 浏览器架构 浏览器架构 formily2学习笔记 formily2学习笔记 前端 CSS 代码规范 前端 CSS 代码规范 less使用指南 less使用指南
 评论